Thank you for purchasing Mantis Tek’s plug and play tidy tail kit for the 2023-2025 MV Agusta F3R (may fit other years).
NOTE: You will need to remove the existing OEM Turn Signal License Plate assembly in order to replace it with the plug and play Mantis Tek Tidy Tail kit.
MANTIS TEK LLC IS NOT RESPONSIBLE FOR THE REMOVAL OF THE ORIGINAL Turn Signal License Plate assembly. PLEASE CONSULT YOUR OWNER’S MANUAL OR LOCAL MV AGUSTA DEALERSHIP BEFORE DOING SO.
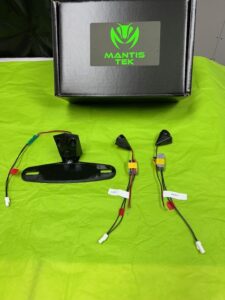 Prior to installation please make sure:
- The bike is turned off;
- Your battery is disconnected; and
- All parts are accounted for:
- Left Turn Signal light assembly (2 pieces)
- Right Turn Signal light assembly (2 pieces)
- License plate holder (1 piece)
License Plate Install
- Open passenger seat.
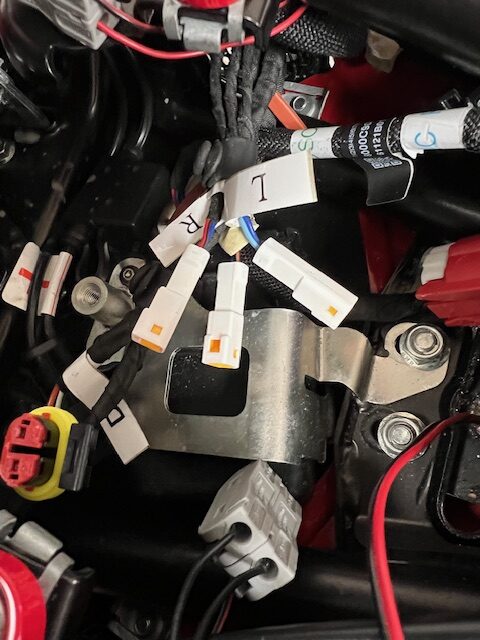
- Locate the license plate light and rear turn signal connectors (there should be three separate connectors). NOTE: We recommend the you take a picture of the existing connectors prior to disconnecting them.
- The Left and Right OEM turn signal connectors may have labels. If not, you should take the time to label each connector (Left, Right, and License Plate Light).
4. Disconnect the Left, Right, and License Plate Light connectors.
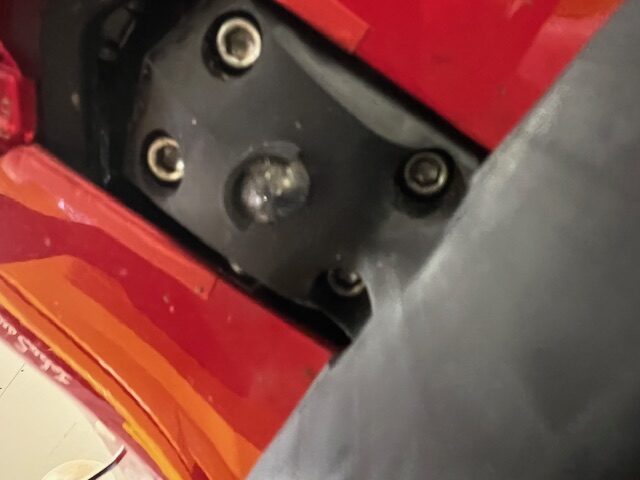
5. Locate the four OEM Turn Signal License Plate assembly bolts located towards the taillight section under the passenger seat.
6. Unscrew the four bolts holding the Turn Signal License Plate assembly (keep the bolts and nuts as you will reuse them to install the Mantis Tek license plate holder).
7. Once bolts are removed, carefully remove the turn Signal License Plate assembly.
8. Place the Mantis Tek Tidy Tail license plate holder in the existing location and insert the light wire thru the hole where the previous OEM wire was located.
9. Align the Mantis Tek license plate holder and bolt it in place with the four OEM bolts and nuts.
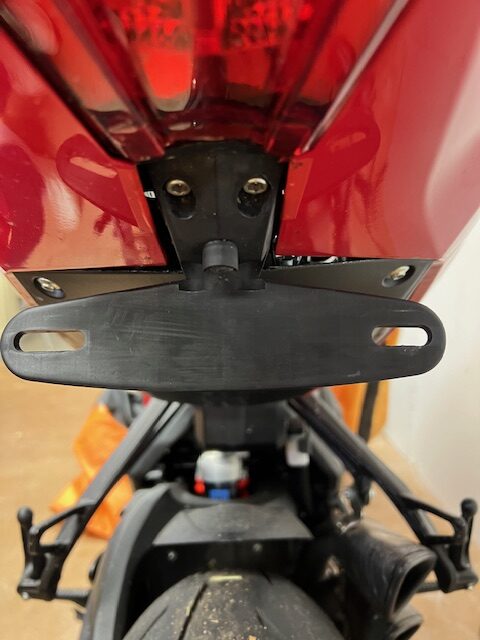
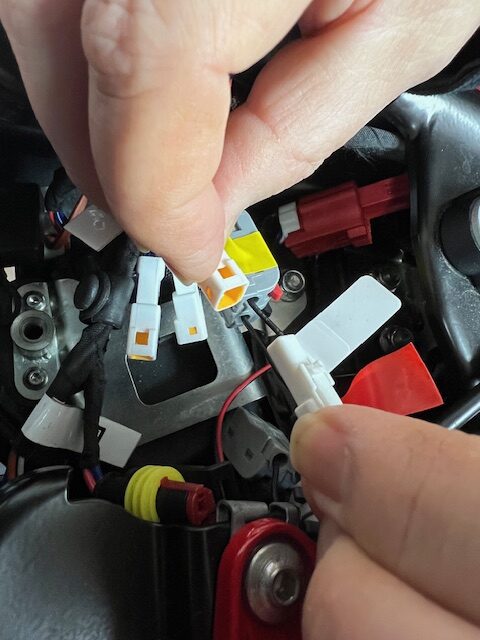
10. Once tightened (do not over torque), directly plug the light connector into the original license plate connector.
Right Turn Signal Install
11. Use the Mantis Tek right turn signal assembly marked “R” (the “R” on the turn signal is for the Right side only).
CAUTION – You must use the correct turn signal with the correct connector (i.e. the Right labelled turn signal can only be used with the Right side gray connector). The left and right parts in the box are NOT interchangeable.
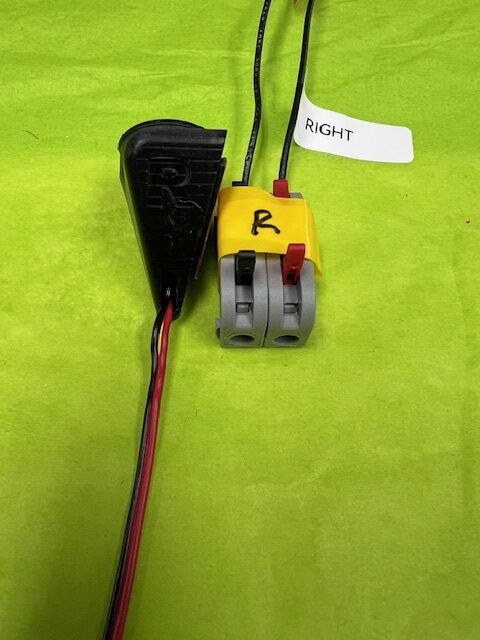
12. Put the gray connector with black and red switches to the side (you will need them later).
13. Remove the “R” turn signal with the black and red wires from the packaging.
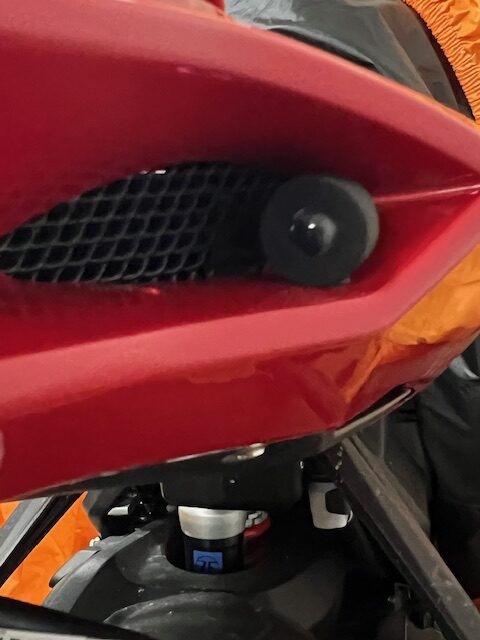
14. With the “R” facing into the right side black grill on the side of the tail- feed the wires into an opening in the side grill as far forward (towards the front of bike) as possible- usually one or two grill spaces from the front.
15. Clean body panel prior to removing the cover on the adhesion tape and that will be facing down
16. Pull wire thru grill hole until the Mantis Tek turn signal is in the correct position and then press firmly down to stick the turn signal to the body panel
17. The wire should be in the inside cavity of passenger seat area.
18. Now connect red wire to the red switch on the Right side of the gray connector and the black wire to the black colored switch with the same connector.
19. Push lever down until you feel a soft click and the wires are connected through to the plug. Gently pull to verify that wires are seated properly in the connector.
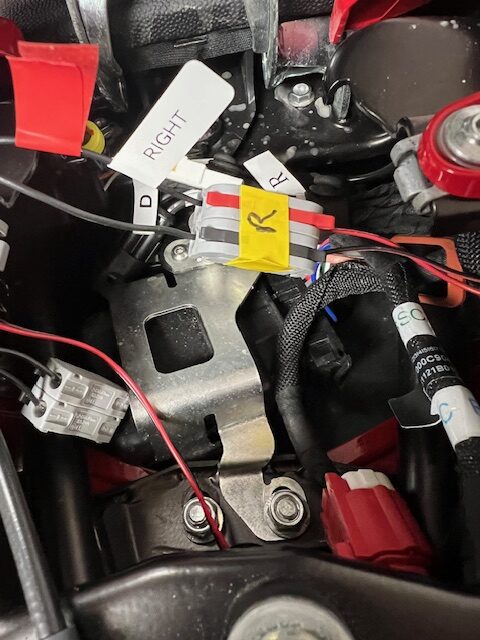
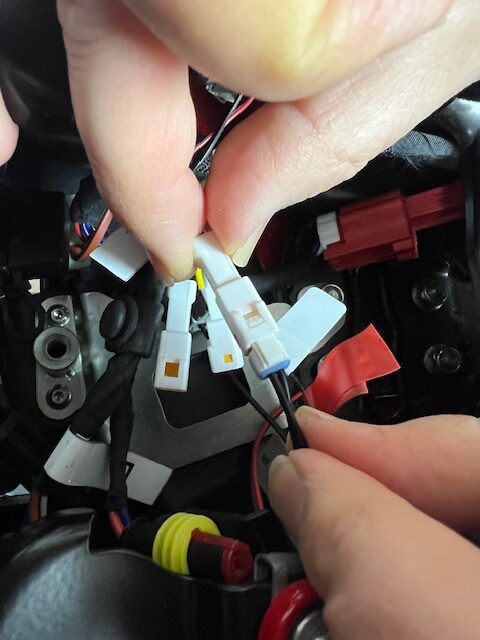
20. Find the right turn signal socket on the motorcycle and plug the new Mantis Tek right turn signal plug into that socket.
21. Repeat steps 11-20 to install the left turn signal.
Test Your Lights:
22. Re-attach battery
23. Turn bike on
24. Check the license plate LED
25. Test your turn signals – left and right to verify correct operation
26. Close the passenger seat
27. Enjoy your new Mantis Tek Tidy Tail!
For any questions about the instructions above please contact us at support@mantistek.net
